Generally, full-screen graphics should not be used on social media videos, especially on TikTok or Instagram Reels. On these platforms, viewers scroll quickly through lots of content. The first seconds of the video should the most attention-grabbing part, the hook that tells your audience what the video is about and why they should pause to watch it.
This element is a transparent overlay that animates the Duke wordmark on and off screen. If the video underneath is bright, the wordmark may be less legible. Using the Banner Style graphic listed above would be more advisable.
Place the file one layer above your video piece on your editing timeline.
If the most engaging part of the video underneath the wordmark is being covered by the wordmark, you can move it up higher on the video.
This is very similar to the Pop Up – Fade Out element, but instead of fading out, the wordmark shrinks and moves to the bottom right corner. This is useful if you want to keep the wordmark on-screen for the entire video. A wordmark adds subtle branding and marks the video if it is downloaded and used externally.
Place the file one layer above your video piece on your editing timeline.
To keep the wordmark in the corner the entire time, you will duplicate the layer and “Add a Frame Hold” on a frame of the graphic that is near the end (after the movement has stopped). Then you can extend it to reach until the end of the video.
Closing Graphic
One of these two animated video outros can be used at the end of your video. If branding is required, using an outro is preferred over an intro.
This element is a good, quick way to highlight that the video features Duke. It covers the the last image of your video and reveals “This is Duke” over a white background.
Place the file one layer above your video piece on your editing timeline, making sure to extend one second of your footage underneath the graphic.
This element useful if you have a good final image on your video and want to add “This is Duke” directly over the footage. It will only function well if the footage is dark enough to support the white text. If not, use the Over White graphic listed above.
Place the file one layer above your video piece on your editing timeline.
It’s an incredible, but busy, time to be a video creator. These days, everyone wants a video to tell their story, showcase their event or bring to life something new or special. It’s clear videos are the ways viewers enjoy consuming content. In 2018, the number of digital video viewers in the United States amounted to 228.8 million viewers. This figure was projected to reach 248.9 million U.S. video viewers in 2022, according to research from statista.com.
Viewers have a voracious appetite for video content consuming about 19 hours of online videos per week – according to a 2021 study from the animated video production company, Wyzowl – an 8.5 hour increase per week since 2018. To meet the demand, businesses have made video creation a clear priority with 92% of marketers valuing videos as an important part of their strategy.
At Duke, content creators have experienced an increased desire for videos as they receive frequent requests for video production work to highlight programs, research and new initiatives.
Before getting started on producing a video, it’s important to determine the message you want to share, which will guide what type of video you should create. When you are considering what type of video would best fit your project, it’s important to consider several key factors including the reason a video is needed, the target audience, your production resources (videographers and editors), your budget and the project timeline. There are numerous video production options to consider depending on your overall goals.
MESSAGE
MEDIUM
Join our program
Ad or Profile
See our work
Raw video or highlight video of best imagery
Hear our story
Documentary or vlog
Participate with us
Live video or “How to” videos
Consider our idea
News style video
Get to know us
Interview or Brand/Marketing Video
Learn this information
Animation or animated explainers
NAME
DESCRIPTION
EXAMPLE
Brand/Marketing video
Highly produced video giving a broad overview of a strategic program, value or vision
When launching a video project, it’s crucial to consider who will be producing the video. That decision should be based on filming and editing resources, project timeline and budget.
At Duke, there are two key options for producing a video:
Do it yourself, which includes:
Planning video concept
Filming interview(s)
Filming footage
Gathering additional assets for your video such as photos and footage from Duke’s content library
Edit video together
Once completed, share on video distribution platform with video thumbnail, captions
Hire someone to help you produce the video such as:
Individual freelancer: Typically a more budget-friendly option. An individual will serve as the videographer and video editor and create your video from start to finish.
Agency: Typically far more expensive. An agency offers a team of people who produce your video. Working with an agency typically yields a video with a higher production value as agencies have more resources available including video equipment and post-production editing resources.
Production Logistics
Whether hiring someone or producing a video yourself, there are key logistics that need to be addressed at the onset of any video project. Once you select what kind of video you will produce, you will want to consider these factors before any filming or editing actually begins:
Interview location: Where should interviews take place? When selecting an interview location, you’ll want to consider a couple location options. When making your selection, you’ll want to scout the locations to determine which spot will be best. When scouting, it’s important to consider lighting and noise at the time of day you will be filming. At Duke, it’s best to work with communications colleagues to reserve various spaces you plan to use for your interviews. A couple options to consider include:
Studio: Clean background with flattering lighting
On site: A location that complements the story you’re telling. For example, if you’re highlighting ground breaking research, an ideal interview location may be in the field or lab where the research was conducted. If you’re showcasing a new program for students, an ideal interview location may be a quiet area on Abele Quad where student foot traffic can be seen in the background.
Interview Subjects: Who should be in your video? It is ideal to have several subjects bringing different perspectives to light. In most cases, it’s best to keep the number of interview subjects at a minimum because you want to avoid having different subjects saying the same things. For example, if you’re highlighting a unique classroom learning opportunity, the faculty member could provide insight on why students are learning in a new and different way and a student could explain what the experience is like and how it leaves a lasting impact.
Interview shooting style: Before going into the interview, consider how you want your subject to appear on camera.
Are they looking straight into the lens or slightly off camera as you interview them?
Is it a tight, medium or wide shot?
Do you need one camera or two to capture various angles?
What does the background look like? Shallow depth of field is a popular style among videographers where the background behind the interview subject is out of focus.
Footage and additional assets: In addition to your interview, your video should include different elements that bring concepts to life including:
Footage captured that directly relates to the story.
Stock imagery provided by Duke or others. Webdam and Duke Archives is a good starting point for this imagery.
Graphics
Animations
Duke branding: Video graphics (see “Video Branding Resources” below) should be applied to all Duke video to provide a consistent look and feel.
Editing: After capturing your interviews and gathering all the assets that will appear in your video, the video must be edited together.
Transcribing the interview(s): Typically your interviews will be far longer than what actually appears in your piece. Many videographers and producers will transcribe their interviews to guide them in weaving together a script that tells a story featuring the best sound bites and complimentary imagery. Premiere Pro, rev.com, otter.ai are some options to consider to create a transcript for you without having to type out your interview word for word.
Editing platform: If you’re going to be doing a lot of video editing, you’ll likely want to invest in first-class editing technology like Adobe Premiere Pro or Apple Final Cut. Many video creators often argue over which editing system they prefer. Duke offers a discount on Premiere Pro software, which is why many communicators prefer it. For a less frequent video editor, Canva or iMovie are tools to consider.
Project Organization
To keep video projects organized in a uniform fashion across Duke, content creators should make an effort to name and organize projects in a similar fashion.
Project naming conventions are aimed at keeping video projects well organized and ensuring others in your department, or another department, will know how to find and identify your project. The preferred way to name the project using the “dated naming convention” is name your folder with a digit date followed by a short description. It’s best to list the date by year, month and date, “YYYYMMDD” followed by a general description. Use all lower case letters and underscores between the date and words.
Example: “20220504_chapel_spring”
For proper names descriptions, always place last name first, for example: “20220504_doe_jane
Organize assets to make it easy for you or others to find different elements of your video project. Having a solid folder structure for various assets will be especially helpful for large video projects. The multimedia team in University Communications has used the folder structure below since 2019 and has found it very effective.
Video Branding Guidelines
Each video produced at Duke should maintain a level of consistency when it comes to fonts, colors and video graphics. Maintaining a sense of branding is key to maintaining credibility with our audience.
When it comes to Duke’s branding elements, there’s a wide array of selections, but be sure to use these approved options:
Video graphics compatible for Premiere Pro and Final Cut software programs. A combination of graphics in the package should be used on every Duke video including video introductions, a video outro, lower thirds, a text overlay and watermark. Guidance on how to use each graphic element can be found in “Video Branding Resources” below.
Additional Key Components
When preparing to share your video, there are two final components to create to accompany your piece. It is crucial to create captions to accompany your video. It’s also recommended to create a video thumbnail designed to catch the viewer’s eye and make them want to watch your video.
Captions: Video captioning offers viewers the text version of the spoken words and non-speech elements that appear in a video. Video captions make your videos more accessible to individuals with auditory challenges. Captions also allow viewers to access your content in locations where audio playback is not an option. The American with Disabilities Act and Rehabilitation Act protects the civil rights of people with disabilities by requiring all federal entities and organizations that receive federal funding to make accommodations for equal access. That means most higher education institutions like Duke must provide captioning for recorded lectures, online courses, class materials, and other video content.
Some video publishing platforms and video editing software offer automated speech-to-text conversion technology which generate captions that are 60-80% accurate which is not acceptable to satisfy captioning requirements. However, these services will allow users to manually edit the text to create perfect captions. Both YouTube and Premiere Pro offer the automated machine captioning with human correction at no additional cost.
For longer videos or projects that may be under tight deadlines, there are fee-based captioning services that can caption videos quickly and efficiently. Duke-vetted captioning resources can be found here.
Thumbnail: Similar to a book cover, the video thumbnail should peek the viewer’s interest and get them interested in watching a video. You can custom create a video thumbnail using software Photoshop. Alternatively, graphic design platforms like Canva offer video thumbnail templates or custom design options. Duke video creators should include the following components on all Duke thumbnail:
Compelling image aimed at catching the viewer’s attention.
Short, catchy headline that summarizes the video. Be sure to keep text short so viewers can read it on first glance.
Duke wordmark placed near one of the four corners. The usage of the wordmark is designed to drive home the fact that the video is about a Duke event or subject matter related to Duke, which is not always conveyed through the image or video title.
Video Hosting Platforms
When you are ready to showcase your video, you will need to upload it to a video hosting platform. Viewers can visit the hosting platform to watch your video or you can use the link or embed code produced through the platform to distribute the video. At Duke, we often use the link or embed code to showcase videos on Duke Today, websites, digital newsletters and other channels.
YouTube is the most well-known example of a video hosting platform but there are other platforms, like Vimeo or Facebook, that have their own advantages. There are different reasons to select a hosting site including audience reach, analytics, video player quality, built-in editing and review tools. In University Communications, YouTube and Vimeo are most commonly used.
Utilizing YouTube as a Hosting Platform
Pros: YouTube has a much larger audience compared to any other video hosting platform with roughly two billion users and counting watching about a billion videos daily. YouTube offers a superior search engine optimization traffic potential meaning the average person may have better luck finding your video on YouTube if they’re searching on the platform itself or elsewhere. Factors including compelling thumbnails and video descriptions can all play a role in making your videos more visible through the YouTube platform. YouTube is also free to use and places no limits on the amount or size of video uploads.
Cons: Many professional video creators turn to YouTube because of its monetization platform allows creators to generate revenue from their videos. At Duke, we create videos to educate, inform and entertain our audience. We do not generate additional revenue from our video work.
For the average user, YouTube can be distracting as it is structured to lure viewers to watch dozens of different videos aside from the one you want them to watch. Another issue– unless viewers are extremely familiar with YouTube settings, the video player auto-defaults to playing the video in low-quality format.
Another downside to using YouTube is that anytime a creator needs to make a change to a video, a new upload is required which creates a new link. Subsequently, the analytics, including video views, associated with the initial link will be lost.
Best Uses: At Duke, it’s best practice to use YouTube as a hosting platform for sharing videos under the following circumstances:
Part of an ongoing series or are similar in topic where they can be grouped together in a playlist. The benefit of the playlists is they make it easy for viewers to watch the type of content they want to watch. Playlists also will be found in YouTube search results which helps grow your channel and audience. In addition to playlists, creators can also utilize end screens to steer viewers to similar videos or playlists for them to watch. Due to the large built-in audience and ability to group similar content, YouTube is the idea platform to share high-priority informational messages from the University leaders.
Hosting live events and premiering pre-produced videos or events. Both experiences are available at no cost. Creators can promote their live event or premiere in advance as YouTube offers a pre-event link and countdown clock. You can also upload promo trailer videos in advance of the event to help generate excitement. During the event, the audience can interact through chat as they watch the event.
Utilizing Vimeo as a Hosting Platform
Pros: Vimeo is preferred among many video creators because the platform is known for showcasing videos at the highest resolution possible and doesn’t have advertisements. The platform automatically selects the best quality video for each viewer’s playback environment which results in a viewing experience that can’t be beat.
Vimeo is also ideal for highlighting a single video that’s not part of a recurring series. There are fewer distractions on the Vimeo platform to contend with allowing the viewer to maintain focus on the content within the video. Overall, our content performs well on Vimeo since many of our views are web based and we aren’t trying to keep users on the platform.
Vimeo offers a review tool for Vimeo Pro members and higher which is ideal for gathering feedback and edit suggestions on a video. Within the review tool, reviewers can leave time-coded notes making the revision process smooth and efficient.
When video updates and changes are required, the initial video link remains the same which is a huge plus during both the review phase and once the video is widely shared. During the review phase, the review team can work from the same link and does not need to hunt down a new link for each round of edits. After a video is finished and shared broadly, unexpected but necessary additions or edits may occur. In these instances, it’s helpful that an editor can tweak the video and replace the video without the link changing. That means the video would automatically get updated wherever it’s embedded without taking additional steps to update embed code. An additional bonus is you don’t lose video performance stats when you replace the video.
Vimeo offers appealing live stream features including customizable branding features and numerous ways to interact with viewers before, during and after a live event.
Cons: Vimeo’s starter plan is free, but tapping into many of the platform’s more desirable features costs money and require purchasing an annual plan. Vimeo also doesn’t have the audience of YouTube where video viewership is much higher.
Best Uses: At Duke, it’s best practice to use Vimeo to showcase videos that are:
particularly cinematic which may include documentary style stories, campus beauty montages and other videos captured with high quality 4K footage
Standalone videos
Videos that will require annual or other timely updates
Finishing Touches
After sharing your video, there are a few final steps video creators should take to attract viewers to a video. There are also archiving guidelines that will be useful in locating the video in the future and allowing other Duke content creators to reuse some of the content for your video.
Attracting viewers to video
After putting in all the work on the video you created, the goal is always to make sure viewers get to check it out. Depending on the hosting platform you select, there are various ways to amplify your content to the Duke community and other viewers.
Amplifying your video on Youtube and Vimeo
Thumbnail
Video description
Keywords
Playlist or Showcase
Work with department social team and others on your team on distribution:
Share on social channels
Share in newsletter
Share on department website
Distribute video to others around Duke who may be interested in promoting:
Share with participants featured in the video for them to amplify
Does your video feature people from different Schools, Units Departments around Duke? Share the link, video file, thumbnail and captions with those units for sharing on their channels
Archiving Guidelines for Video Projects
Every video project should be saved for future use in your department or in other areas across the University. Projects should not be archived on an external hard drive which can break or get lost. Instead consider archiving through a Duke OIT storage server established within your department. There are several components of each video project that should be archived:
The exact video that was broadly shared.
The video that was shared broadly with music and graphics removed. This is helpful for re-use purposes.
Edit the best 40-60 seconds of b-roll from the video project. The b-roll should be archived along with your project piece.
If the broll could be useful to other Duke communicators to use with their projects, share the b-roll with the Digital and Brand Strategy Team at disco@duke.edu to upload on Webdam. If sharing the broll for Webdam, be sure to include relevant information about the footage including a brief description of the imagery, relative capture date, who captured the imagery.
Video Branding Resources
The elements in Duke’s video graphics package will ensure all videos created on behalf of Duke convey a consistent look and feel. A combination of graphics in the package should be used on every Duke video including video introductions, a video outro, lower thirds, a text overlay and watermark. When selecting fonts and colors while creating the customizable graphics, users should adhere to the Duke Brand Guide.
There are two versions of the video graphics package which are designed for use with Premiere Pro and Final Cut Pro.
The animated video introduction introduces your video. There are two options available.
Duke Introduction with background
This element includes an iconic aerial image of Duke, the Duke wordmark and wipes to reveal the video.
To use this element:
Place the intro one layer above your video piece on your editing timeline.
Extend your first video shot by about one second beneath the intro.
Watch the start of you video to ensure there is no black between the intro and start of your piece. If there is, extend the first shot further to ensure a smooth transition.
There’s no music with the introduction. Incorporate the music bed or audio track from your piece.
Recommended uses: Duke events, programs, courses, how to videos or any video that needs a Duke scene setter. This intro should be used with videos that will primarily have an external audience.
Duke Introduction with no background
This element is a transparent overlay that animates the Duke wordmark on and off screen.
To use this element:
Import the “Duke Intro (no background).mogrt” into your Premiere Pro Essential Graphics. If you are using Final Cut Pro, install the graphics package using these detailed instructions.
Place the mogrt overlay where you’d like it to appear towards the beginning of your video.
The overlay color and length can be adjusted if needed. White or Duke blue (#012169) the preferred colors for the title.
There’s no music with the overlay. Incorporate the music bed or audio track from your piece.
Recommended uses: Feature videos that begin with compelling visuals of campus, research or activity.
Video Outro
The animated video outro will end every video. This element wipes to close the piece and includes the text “This is Duke.”
To use this element:
Place the outro one layer above your video piece on your editing timeline and make sure the outro lined up at the very end on your video.
Extend the final video shot by one second beneath the outro.
Watch the end of the video to ensure there’s no black between the end of the video and when the outro animates on screen. If there is, extend your final shot further until there is a smooth transition.
There’s no music with the outro. Incorporate the music bed or audio track from your piece.
Lower Thirds/Name Supers
Customizable lower thirds complement the video introduction and outro with similar color, style and theme. When using the lower thirds, users will have the ability to add in the name and title of subjects who need to be identified in the video piece.
To use this element:
Import the “Duke_LT_BG_left.mogrt” or “Duke_LT_BG_left.mogrt” into your Premiere Pro Essential Graphics. If you are using Final Cut Pro, install the graphics package using these detailed instructions.
Place your lower third on the video layer above the subject in your timeline.
Click once on the lower third on your timeline to customize within the Essential Graphics panel. You will have the ability to customize name, title, colors, and fonts. Only use Duke approved colors and fonts which can be found in the brand guide. We recommend using Open Sans, Lato or Garamond.
Text Box
A customizable text box allows users to add explain visuals appearing on screen. Depending on the length of the description, the text box can grow or shrink.
To use this element:
Import the “Duke_text_callout.mogrt” into your Premiere Pro Essential Graphics. If you are using Final Cut Pro, install the graphics package using these detailed instructions.
Place the Text Box lower third on the video layer above the subject in your timeline.
Click once on the text box on your timeline to customize within the Essential Graphics panel. You will have the ability to add in your own text and adjust the opacity of the text box.
Recommended uses: Videos that have little to no narration, videos that require text to explain a certain visual on screen.
Wordmark
A small Duke wordmark should be placed in the lower right-hand corner of every Duke video.
To use:
Import the “Duke watermark_small_corner.mogrt” into your project. If you are using Final Cut Pro, install the graphics package using these detailed instructions.
Place the watermark above your video on your timeline and extend it across your entire video piece. Note- The graphic should be above your video layer but directly below your intro and outro.
After you’ve produced a great piece of content, you want as many people as possible to see it. That’s where optimization comes in. The following tips will help people discover and engage with your videos.
Metadata
In just a few minutes, you can make easy adjustments to your titles, tags and descriptions that will help YouTube index your content—and help you show up in search results and suggested videos.
Descriptive title: Be sure to use descriptive words at the beginning of your title and keep titles concise. Move branding words (like the name of your department or class) and episode numbers to the end of the title.
Description: Get an accurate description of your video in the first few sentences—that’s what will appear in search results. Also, make sure you use some keywords in your description.
Channel link: Providing a link to your channel in the description helps drive visitors to your channel page.
Playlist link: Including a link to a playlist in your description encourages viewers to stick around longer and try some of your other videos. Create playlists by thinking, “If I was a viewer and loved this video, what other videos on this channel would I love?”
Subscribe link: Fans are more likely to subscribe to your channel if you personally suggest it to them through your video description.
Social media links: Adding links to your social media (Twitter, Facebook, etc.) in your description gives fans another way to interact with you.
Tags: Make sure your title, description and tags share some keywords to improve searchability. Using a set of standard tags for your channel each time you upload will help with your search engine rankings, too. The standard tags should apply to most of the content you produce. For example, you can tag all videos with “Duke University.”
Annotations
Annotations are clickable links and comments overlaid on your YouTube video. They take a little time to master, but they can drive viewers to more content, increase engagement on your videos and earn you more subscribers.
Link to other videos: Be sure to link to at least one other video of yours. You may want to link to related content, other videos in your series or playlists. By having an annotation link to a playlist you are increasing your chances of viewers watching a series of your content. If a viewer watches a playlist, you can get 10 views for the price of one!
Make a subscribe button: Viewers are more likely to subscribe to you if you personally suggest it to them through annotations.
Set links to open in a new window: By setting your annotation links to open in a new window, you can allow your viewers to come back to your video and hit the Play button again, right where they left off.
More to Consider
There are other things you can do to make your videos more shareable and widely useable.
Captioning: By having captions you can reach viewers with hearing loss or those who are watching while at work. You can either use YouTube’s auto-captioning service or write your own captions. (Your own captions are better, but take more time.) Captions also act as additional metadata, which helps your video show up in more places on YouTube.
Allow comments and ratings: Allowing “likes” can help your video spread because other YouTube users can share which videos they’ve liked. Comments are a way for your viewers to interact with your videos and can increase engagement.
Use the Education tab: You can enter lecturer information, course material and learning objectives if appropriate for your video.
Want more information and a deeper look at YouTube best practices? Check out the YouTube Creator Playbook.
Communications offices across Duke have begun webcasting their events to reach larger audiences. Although Duke does not have a centralized webcasting service, it does offer a number of resources to help you publicize your online event. Duke University Communications offers the following tips.
General Advice
If you are new to webcasting and have general questions about when it makes sense to use it, and how best to proceed, contact ONC’s Sonja Foust.
Permission
For event participants not employed by Duke, you should get written permission to record the event. Do not record an event against a participant’s wishes. Duke’s Scholarly Communications Officer provides sample releases in his Scholarly Communications Toolkit. For productions that will capture audience members in a significant way, for example a question-and-answer period with a speaker, it is recommended that you announce at the event that it is being webcast.
Technical Support
Your school or unit may have someone with the necessary technical skills to help you set up a webcast, or you can explore the Office of Information Technology’s Audio/Video Consultation services.
Production
If you need help with video production or webcasting, or want to use a professional studio, contact Duke Media Services.
A quick and easy way to bring your event to the attention of a larger audience is by listing it on Events@Duke, the university’s online calendar (which you should be using anyway, even if the event is not webcast). Be sure to mark your event as belonging to the “Webcast” category, along with any other categories, and include the appropriate URL in the webcast field.
Embed the Webcast on your Site
If you use YouTube Live or Hangouts on Air, you can embed the video player on your website much as you would with a recorded YouTube video. Doing so brings the event to your entire community while also enhancing your site.
Social Media
Use Twitter, Facebook and other social media tools to promote your webcast. Twitter is especially good for last-minute notifications (using the hashtag #dukelive). Of course, you’ll also want to publicize the event on your website, with email lists and by using other familiar tools. For questions about social media, contact University Communications’ Sonja Likness.
Coordinate with University Communications
If your event will be of special interest to a campus-wide, regional or national audience, ONC may be able to help you publicize it. In addition to the people named above, contact Keith Lawrence for assistance with media outreach or Geoffrey Mock for coverage in Duke Today.
Wrap Up
Once your webcast is finished you can post the recording to the Duke YouTube and/or iTunes sites. For assistance with that, contact the YouTube team at ONC.
Plan Ahead!
Do not expect any of these tips to be of much help unless you plan ahead. Please provide several days’ notice to enable University Communications, Duke Media Services or others across campus to provide the assistance you need. Don’t wait until the last minute.
Match the location of the interview with its topic.
Shoot in a deep room so the background blurs out.
Look for interesting compositions by using dramatic perspectives in the backgrounds. Walls should recede into the background at an angle.
Remove visual clutter from the background but leave in objects that are relevant to the interview and/or provide visual interest without being a distraction.
Positioning People and Lights
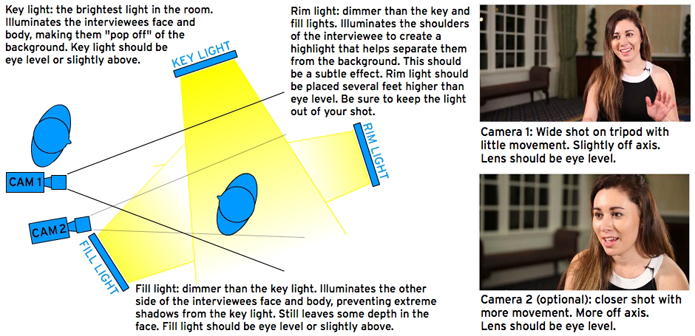
Set up the interviewer to be slightly off to the left or right of the camera, depending on which way you want the interviewee looking.
Set up the interviewee using the rule of thirds: divide the screen into thirds vertically and align the interviewee along one of the dividing lines, leaving more room in the direction he is looking.
Using a three-point light kit, set the key light to illuminate the side of the face with more breathing room, the fill light on the side closest to the edge, and the rim light behind the interviewee angled down to illuminate their head and shoulders.
Make sure the interviewee is the brightest element of the shot.
Positioning the Second Camera
When using two cameras, set Camera 2 closer and a little more off-axis than Camera 1. Make sure both cameras are on the same side of the interviewee, either left or right. Don’t put one on each side. This is called breaking the axis and it can be jarring for the viewer.
Selecting your Camera and Settings
When possible, shoot with a Canon 5D Mark III or a comparable DSLR camera with nice lenses.
Set the camera to shoot 1080p (1920×1080) at 24fps.
Set custom white balance equally on both cameras.
Shoot with a wide enough aperture to reduce depth of field and blur the background.
Set focus to manual. (The 5D automatically shoots with manual focus.)
Ensure the depth of field is deep enough to keep the subject in focus if they lean in or out (between F4 and 10, generally).
Extra credit: If you own your camera (not renting), download the “flat” cinestyle color profile and shoot neutral. This will give the editor full control over all color correction in post production.
Camera Movement
Camera 1 should be set on a fluid head tripod and the operator should utilize a very minimal “floating” technique.
Camera 2 should be set on a fluid head tripod and the operator should utilize a very minimal “floating” technique.
Alternatively, Camera 2 could be on a shoulder mount with very little movement.
Audio
For stationary interviews, use a wired lavaliere mic. For interviews in which the interviewee is moving, use a wireless lavaliere mic. Hide the wire underneath the interviewee’s clothing.
Turn off all devices that beep or buzz.
DSLRs don’t record high quality audio, even if you use a nice XLR mic and plug it into the mini mic port on the DSLR. So, make sure that audio is being sent to a separate mixer or recorder like the Zoom H4N or Tascam.
Make sure someone is always monitoring audio to make volume adjustments, catch any background noises that are going to be a problem, and to make sure the mic doesn’t drop out (batteries can die, and equipment can malfunction).
For outdoor interviews, watch out for wind! It can sound much louder through a mic than to the ear.
Les Todd (retired from Duke Photography July 2016) lestodd.photoshelter.com Ltodd1000@gmail.com (919) 725-3637
Duke references: Deborah Hill, Tori Hall, Bryan Roth, Jenna Brown, Aaron Wellborn, Shawn Rocco, Sally Hicks, Steve Hartsoe, Jeannine Sato, Mandy Dixon, Susan Kauffman, Paul Grantham
York Wilson Photography yorkwilsonphoto.com
(919) 368-5079
Duke references: Sally Hicks
Duke Communicators are invited to submit the names of photographers to be considered for this list. We also welcome feedback about your experiences working with freelance photographers. Suggestions will be reviewed quarterly along with feedback and the list will be updated accordingly. Please email input and suggestions to photos@duke.edu. Thank you for sharing your input and helping to make our network even stronger.
We’ve pulled together a list of the best resources available for Duke’s video community below. Take a look!
Guidelines, Policies, Best Practices
Duke video graphics package (NETID required) – Use these bumpers and graphics to brand and enhance your videos. Check out the Video Branding Resources on the Duke Brand Guide for more information on how to use these assets.
Adobe Creative Cloud license – For Duke faculty and staff, Creative Cloud accounts (includes Adobe Premiere) are available for purchase for $150 per year. (It’s free for students.)
Captioning services – Preferred providers of captioning services at Duke-specific rates.
Multimedia Project Studio – Two multimedia production facilities for Duke students, faculty and staff. Labs feature high-end, integrated hardware and software to create graphics, audio and video, including Apple’s Final Cut Pro for video editing.
Duke Digital Initiative – Resources for students and faculty to experiment with new technology.
DukeCapture/Panopto – Automated lecture and event recording system at sites across Duke campus.
Warpwire – Allows Duke community to distribute media files (like video) via streaming servers with control access by group and NetID.
2013 POV Documentary Equipment Survey – A list of the most common equipment and software used by documentarians. Good starting point when you’re shopping.
HR Special Development Programs – Offers numerous professional development workshops, including ones on certain multimedia tools.
Lynda online training tutorials – Duke students, faculty and staff can access the entire lynda.com online training library through a university-wide site license. Topics include graphics, video editing and training on specific video editing software like Adobe Premiere and Final Cut Pro.
ProComm – Professional development program for communications professionals at Duke.
OIT training – Both in-person and online training to support Duke students, staff and faculty.
OIT Tech Tutors – Looking for dedicated help getting started or completing a multimedia (audio/video), graphics or web design project you are working on? OIT is here for you!
OIT Consultations – Expertise to assist with audio/video purchasing or integration projects, consultation on available audio/video rentals and resources in the area.
Office of News and Communications – Works with the news media and others to highlight the activities of Duke’s faculty, students and staff.
StoryHunter – Hire freelance journalists and videographers through Public Affairs and Government Relations’ subscription. Contact Laura Brinn for details.
Video is one of our most powerful tools for telling stories and reaching university audiences. Navigating the possibilities of video takes many kinds of skills and tools. We’ve outlined some best practices and solutions below.
Production
Process
Video production can be a long sequence with many phases. These guides can help you and your video subjects through the process.
Video Production Timeline
Filming Guidelines
Interview Guidelines
What to Wear on Camera
Release Form
Tools & Software
Discounted licenses of some video-editing programs may be purchased through Duke, and many tools are available from various offices and initiatives. Learn more about available video tools & software.
For ease-of-use, we’ve also produced Duke-branded video project templates for Adobe Premiere Pro CC, Final Cut X and iMovie, which are available in the Video Graphics Package.
Distribution
Online Hosting with YouTube
With 1 billion regular users and an estimated 1 trillion hours of uploaded footage, YouTube is our preferred hosting solution for online, public video content. By hosting your videos on YouTube, you will be tapping a source that’s highly preferred in Google’s search results. Using a Duke-affiliated channel allows institutional channels to share and amplify videos from your organization.
Sharing & Native Hosting on Social Media
Though videos hosted on sites like YouTube can often be shared on social media, some platforms boost the visibility of videos that are natively uploaded over posts that link externally-hosted videos. Other platforms, such as Instagram, only allow native video uploads. In cases where you would like to use native video, consult the target social media platform’s documentation for specific instructions and guidelines.
Graphics Package
The Duke Video Graphics Package is accessible to members of the Duke community through WebDAM. A pre-packaged, editable graphics kit is available for Premiere Pro users along with the individual assets for use with other video editing software. See the Video Graphics Instructions document in the folder for additional information and examples.
A B-roll library containing a variety of footage from across campus is available to the Duke community in via Duke’s WebDAM. A NETID is required for access.
From meeting spaces to theaters to natural areas, a variety of venues are available for capturing video across campus. We’ve compiled a list of these locations along with notes about the area and contact details for reserving the space. A NETID is required for access.
The purpose of these guidelines is to help Duke communicators understand how Duke policies apply to digital communications such as blogs and social media, and to guide them in using social media platforms. The guidelines apply to material that Duke communications offices and related units publish on Duke-hosted websites and branded Duke unit profiles such as those on Facebook and Instagram. Any questions about these guidelines should be directed to socialmedia@duke.edu. Duke Health employees should refer to the specific standards and guidelines established for Duke Health sites and digital channels.
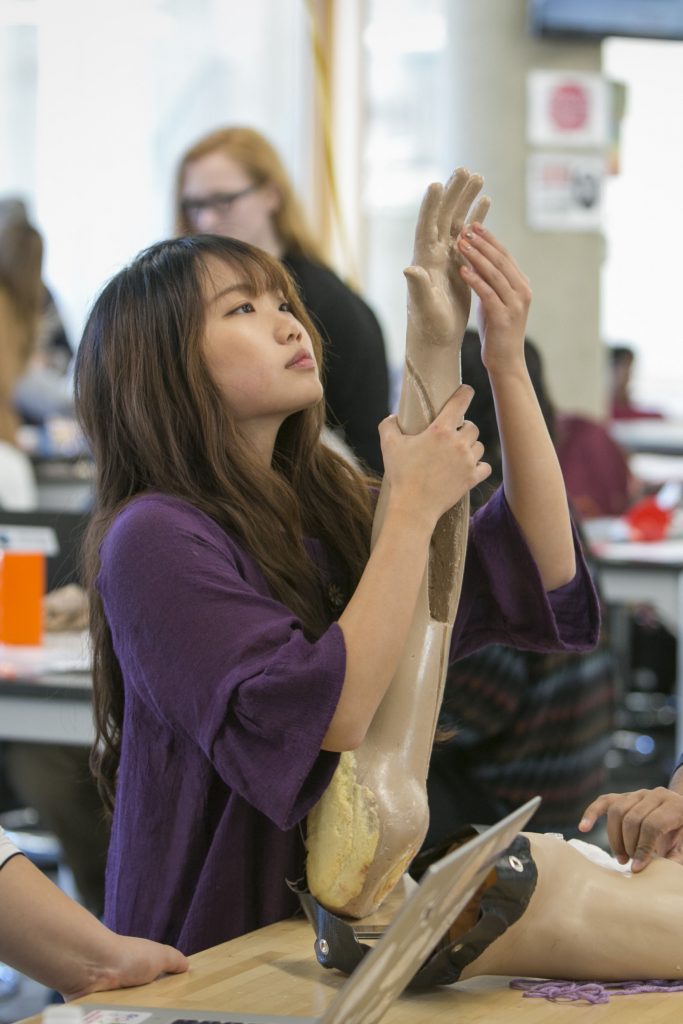
When choosing photography for your project, a combination of thematic stock photos and custom photoshoots should be able to provide all necessary images. When choosing (and shooting) images, look for:
interesting, asymmetric compositions
“white” or negative space
utilize close crops
diversity of subjects both in race and gender
subject matter of off-campus images should be topical
Avoid excessive shots of campus architecture. Instead, choose classrooms, students, or natural elements (plants, sky, etc.). When applicable, incorporate current event images to convey a theme or topic. Look for editorial images instead of banal “stock” images. Lastly, use global images as much as possible. Try not to limit industry/initiative images to a U.S. focus.
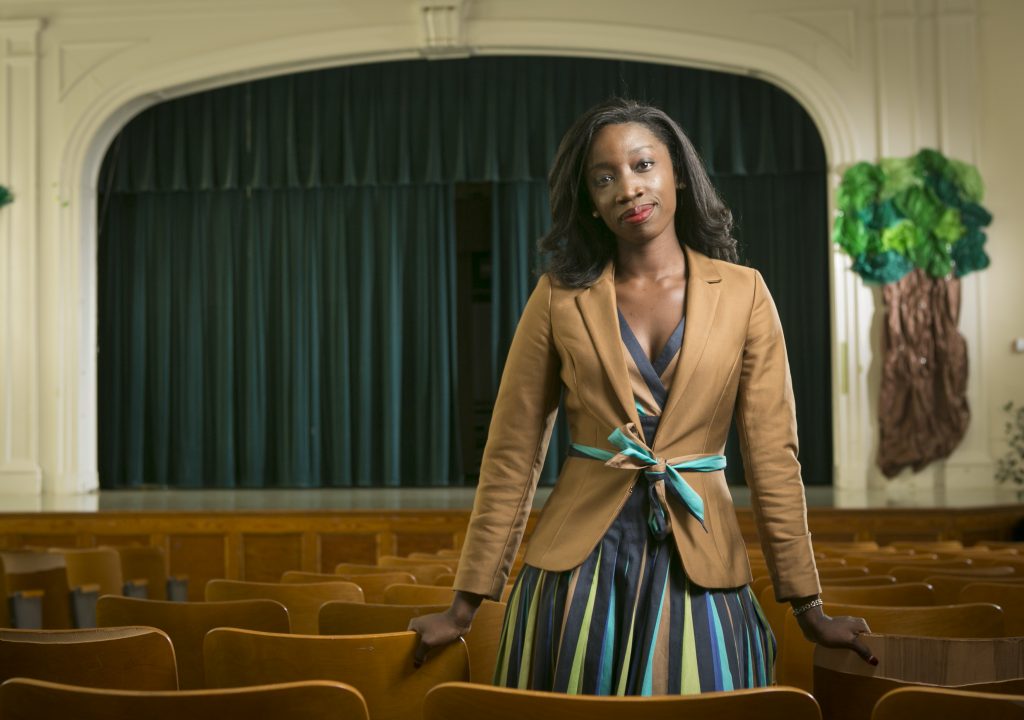
Portraits
Portraits should be forward-facing with the following attributes:
Intimate & authentic
Clean and simple composition
Soft background
Looking toward camera
Relevant props & environments
Alumni portraits should be off-campus (to illustrate our impact in the real world) and, when at all possible, include props from their industry. When portraits occur on campus, choose interesting backgrounds such as artwork or the natural world.
Other Things to Consider
Focus
Create a point of focus such that the background blurs a bit, but avoid the image getting too “soft.”
Expression
Can be anything, really. Just try and capture your subject at ease, with their most natural expression.
Background
Be creative, look for backgrounds that are graphic, quiet, or artful.
Proximity
Try the extremes; either really close or really far can be unusual and wonderful.
Candids/In-context
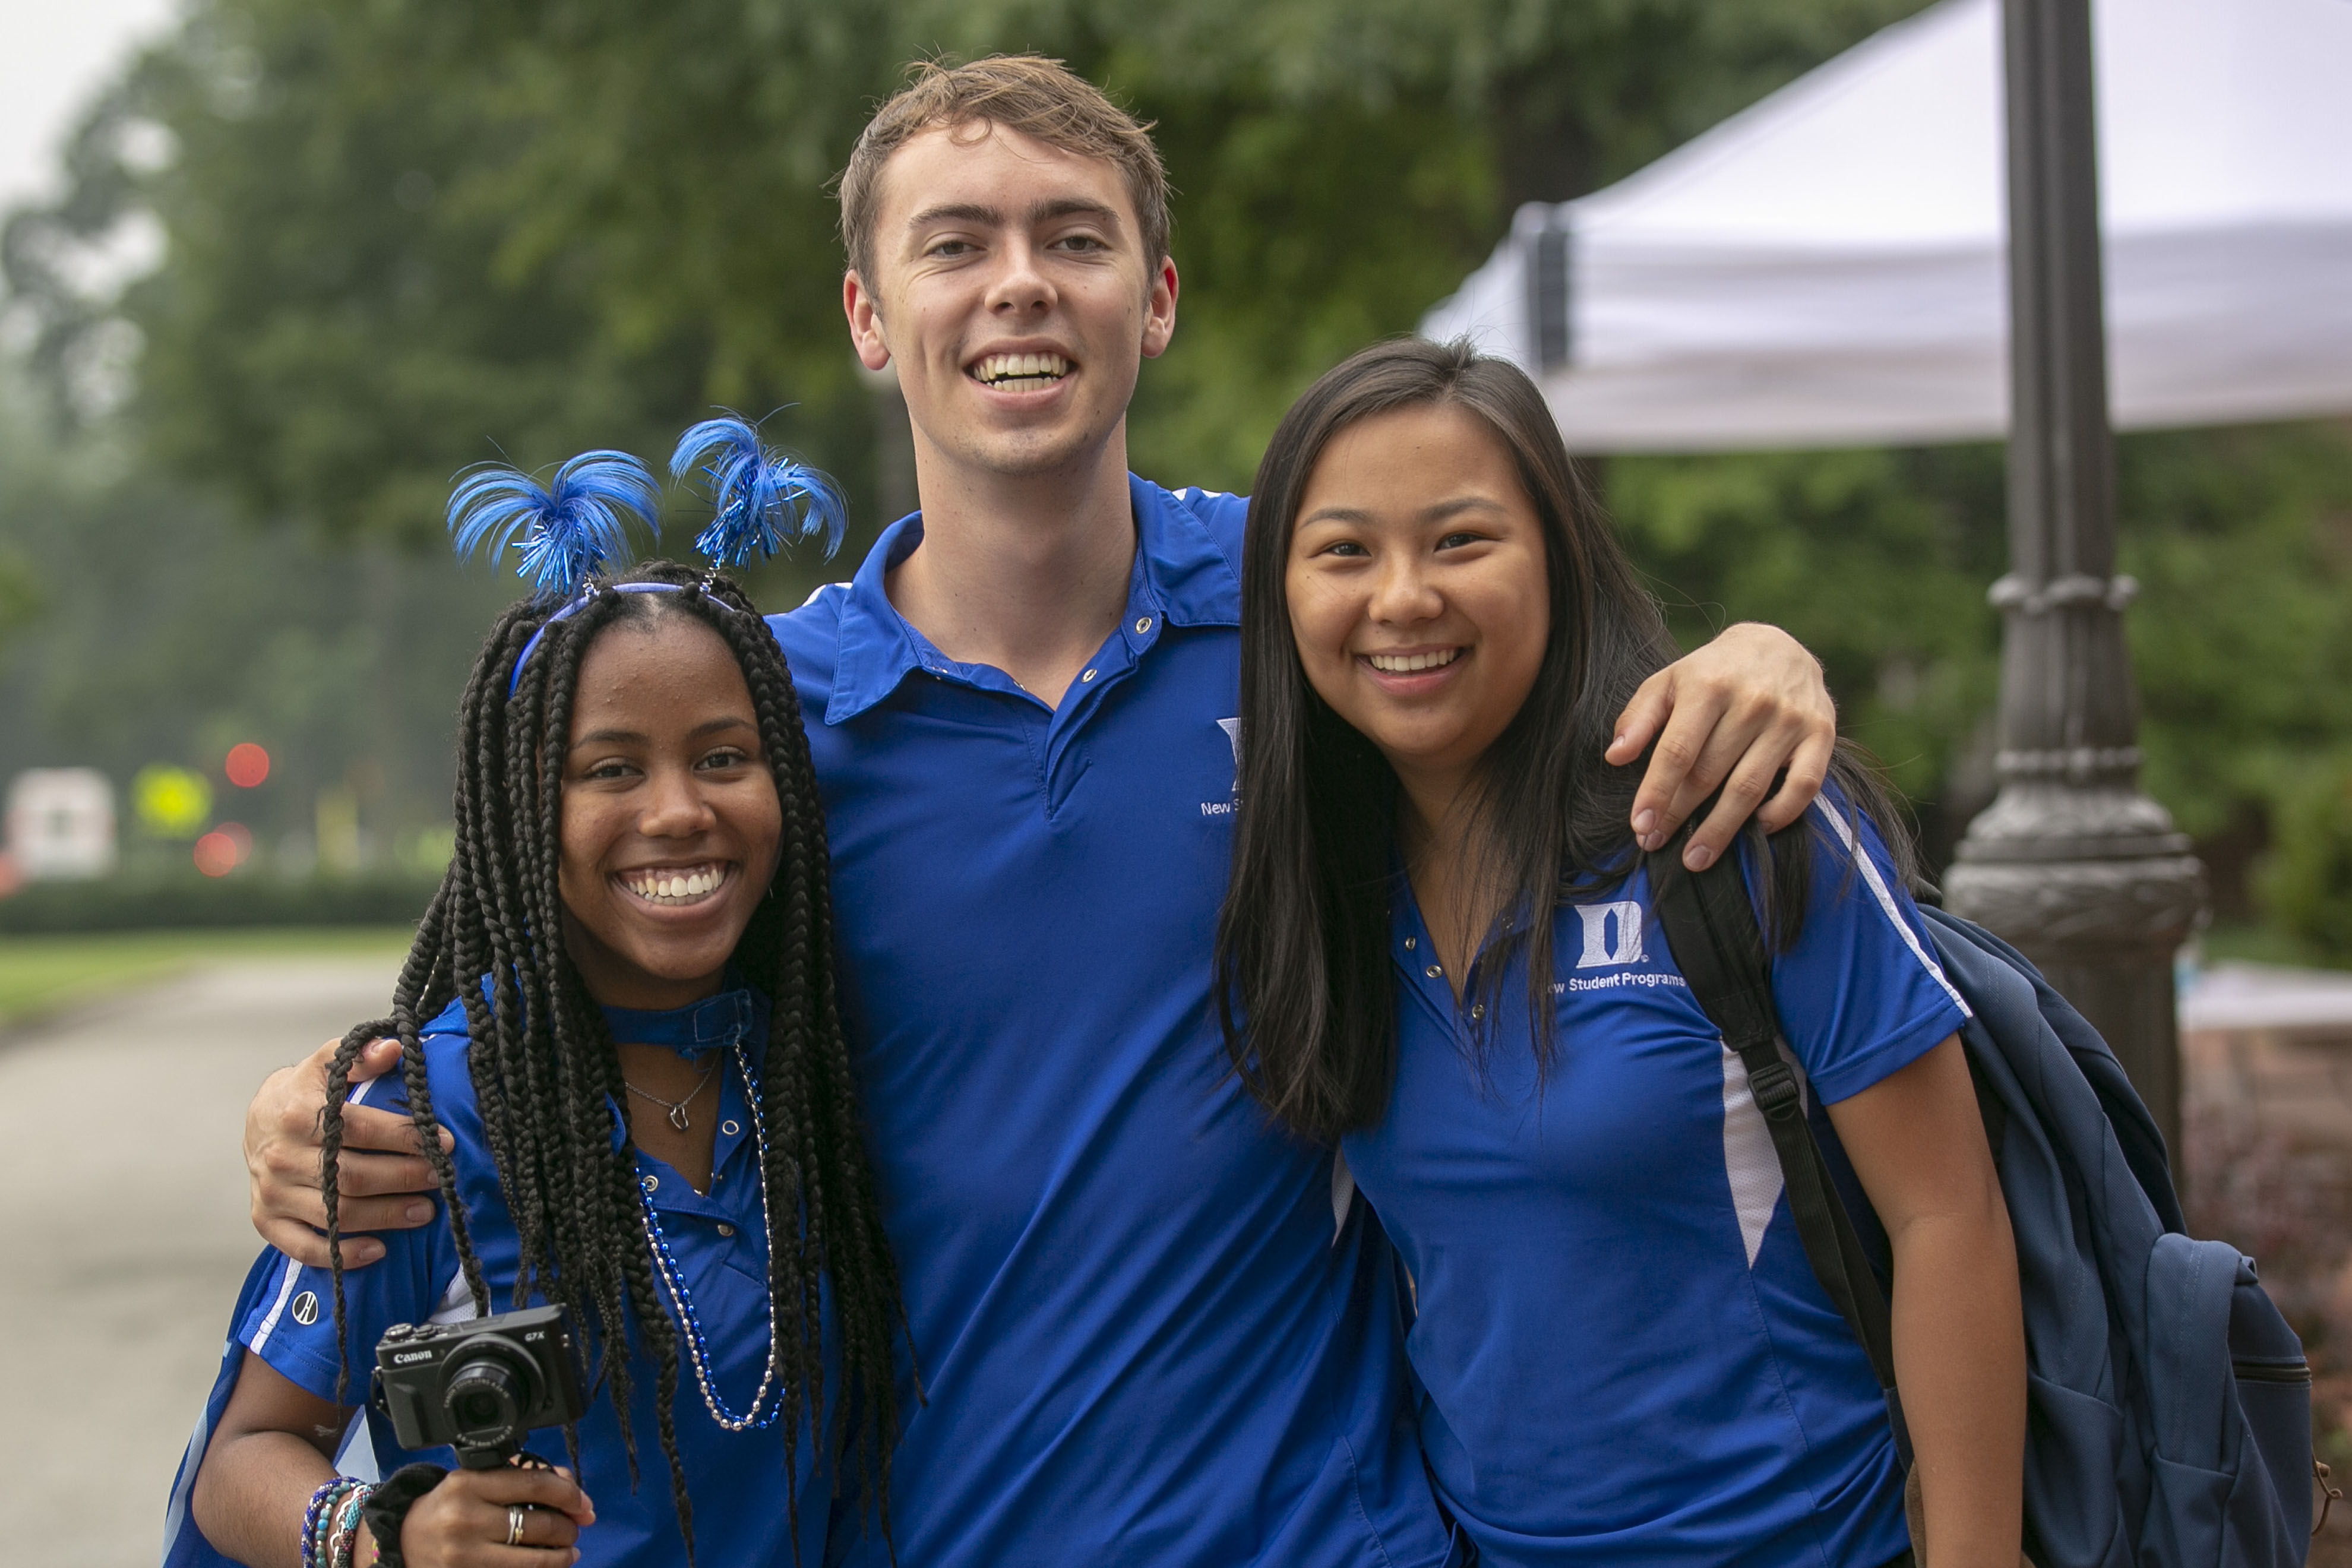
Effective photographs will have the following attributes:
Action, reaction and interaction
Showing community
Unusual angles & points-of-view
Context & space
Immersive
Photographs that make the user feel as though they are a part of the action can be very impactful. It gives the viewer a sense of being a part of the setting rather than simply viewing.
Successful event photography will capture the unique aspects of the event along with the sponsoring unit’s brand/mark. It may seem like photos of speakers, lectures or symposiums provide context but the goal is to differentiate it from all other photos of event speakers. A photographer should seek opportunities to capture interaction of the speaker(s) with the audience and shoot from different angles.
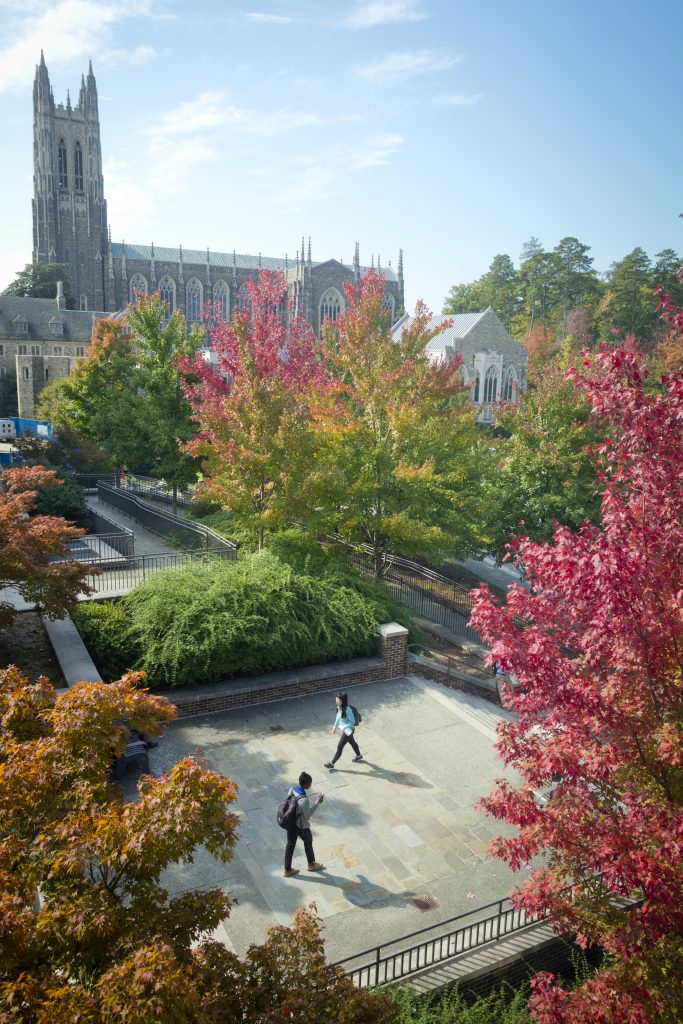
Scenics & Interiors
Duke is a beautiful place. When considering scenic imagery, consider the time of day for lighting, the traffic pattern of the area and if there may be any zones with special privacy considerations (i.e. the Health System).
Time of day & light
Traffic & activity
People inhabiting the scene
Leading lines & framing
Scale, depth and layers
Incorrect Use of Imagery
Please keep these guidelines in mind when selecting images:
Use stock photos sparingly and avoid those that have a generic feel
Use filters sparingly and avoid distorting the natural look of photos
Obtaining Signed Releases
Most spaces on campus are considered public domain and therefore releases of photos/video captured in these areas (the Quads, grounds, spaces open to the public) do not require a signed consent form.
Signed releases must be obtained from all people photographed during formal photo shoots and video shoots for promotional materials.
The more an image easily identifies a specific individual, the more likely it is that written permission from the person photographed is necessary. If you plan to attach the name of a participant to a particular photograph in promotional materials, make sure that you have a signed release from that person. Group and crowd shots, where individuals are not easily identifiable, do not require specific permission from all individuals appearing in the image you are planning to use.
To maintain patient privacy and ensure HIPAA compliance, any photography or videography in or near the Health System requires permission from the Health System. Please contact Duke Health News & Media for more information.
Releases should be stored WITH the image file and not exist separate from the photo.
Photography Resources
Duke’s Asset Management System (NETID required) is a wonderful resource of over 7,000 images. It is refreshed regularly with community-sourced photos as well as new imagery captured by the University Communications team.
Duke University Archives Yearlook Flickr site is a great resource for archival photos of Duke through the years.


